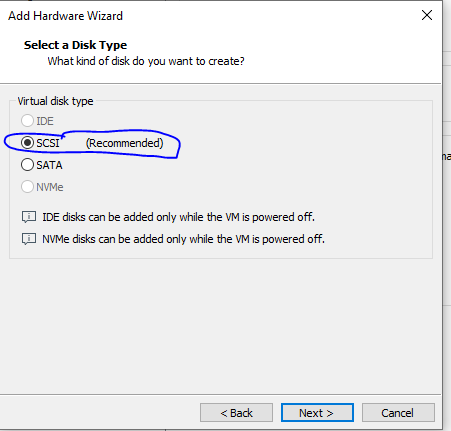
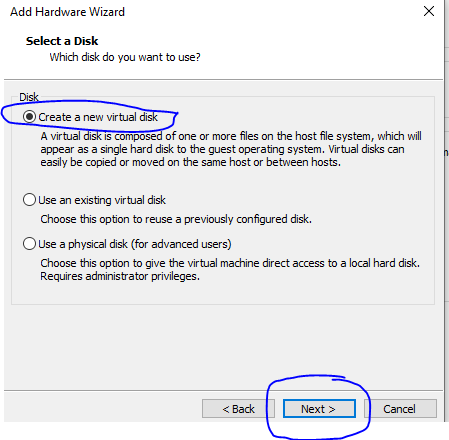
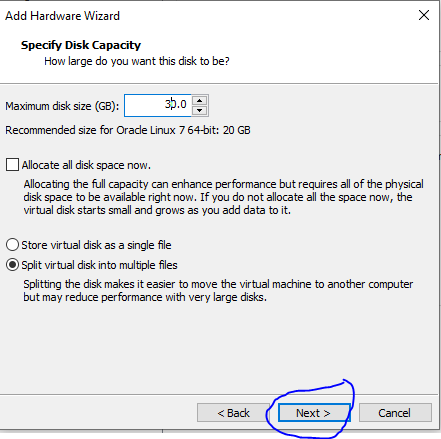
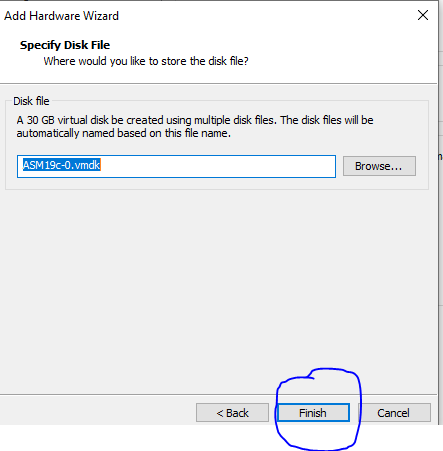
Add 30 GB HDD to virtual machine which we will use to create 3 partitions of 10 GB each for our ASM disks. Open Virtual machine >> Settings >> Storage >> Controller: SATA >> Create new disk
create 3 partitions of 10 GB each for our ASM disks
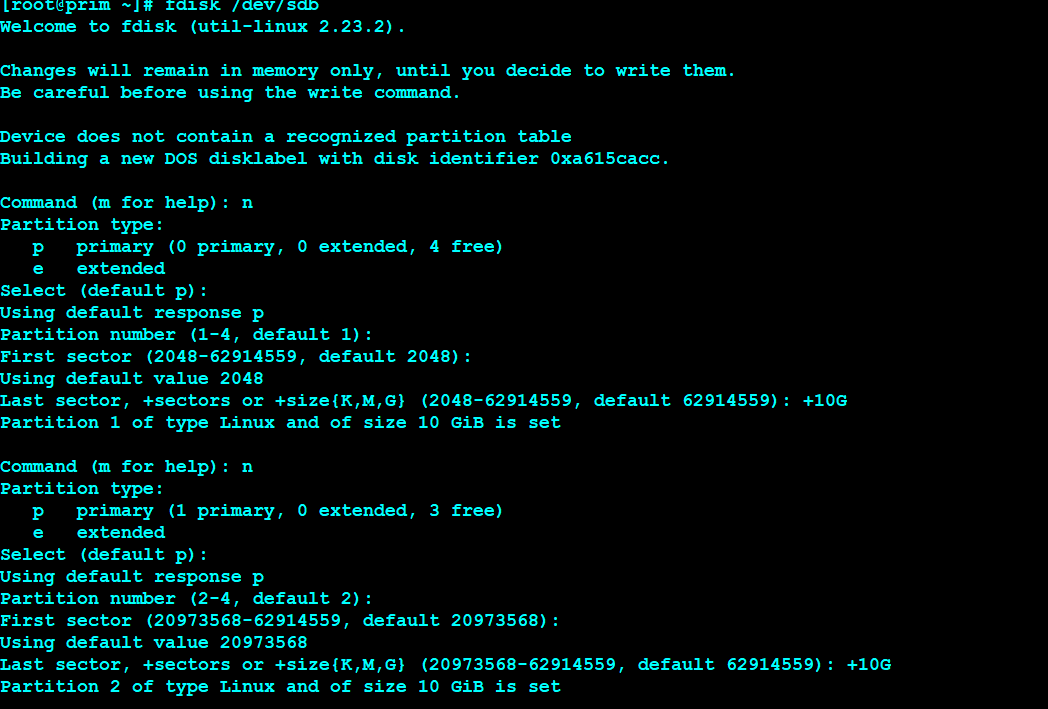
login as root user to format the disk
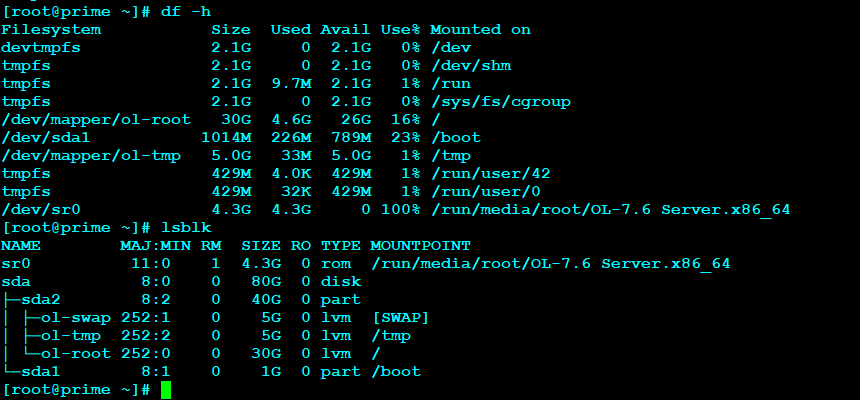
fdisk -l
In the above output the /dev/sdb is not yet formatted. Let’s create 3 partitions on sdb
fdisk /dev/sdb

n                        --> to create new partition
<enter>
<enter>
<enter>
+10G

n
<enter>
<enter>
<enter>
+10G

n
<enter>
<enter>
<enter>
<enter>

w                        --> to save partition table
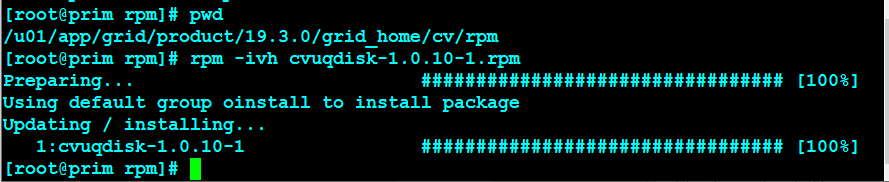
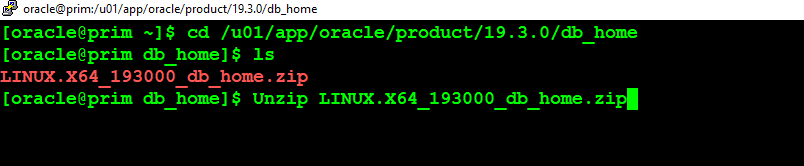
[root@prim rpm]# pwd
/u01/app/grid/product/19.3.0/grid_home/cv/rpm
[root@prim rpm]# rpm -ivh cvuqdisk-1.0.10-1.rpm
Preparing...                          ################################# [100%]
Using default group oinstall to install package
Updating / installing...
   1:cvuqdisk-1.0.10-1                ################################# [100%]
[root@prim rpm]#
To install package (under root user):
cd /u01/app/grid/product/19.3.0/grid_home/cv/rpm

rpm -ivh cvuqdisk-1.0.10-1.rpm
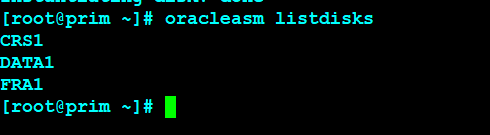
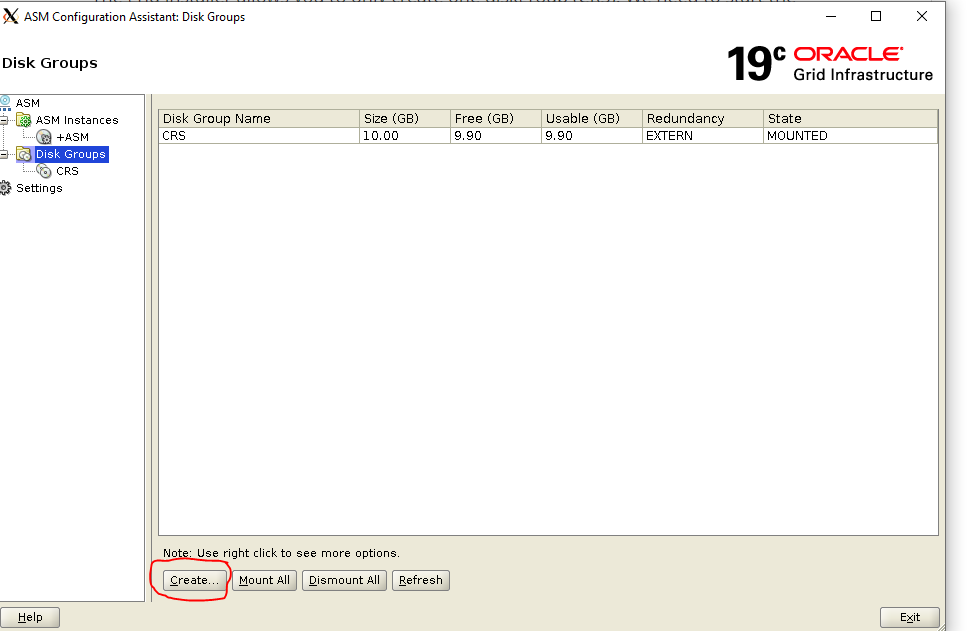
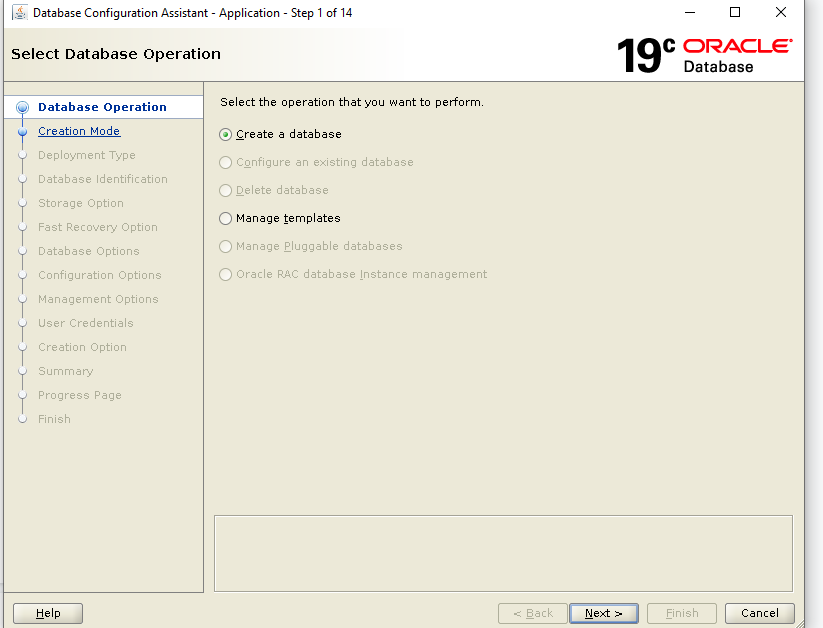
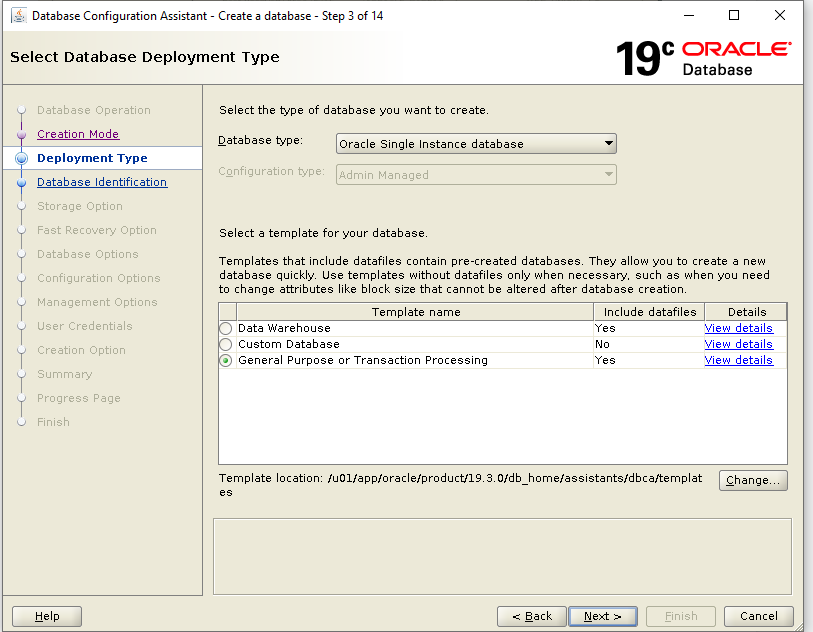
Configure ASM Diskgroups
The grid installer allows you to only create one diskgroup (CRS). We need to start the asmca utility in order to create DATA and FRA diskgroup which are required for database installation. Click on Create
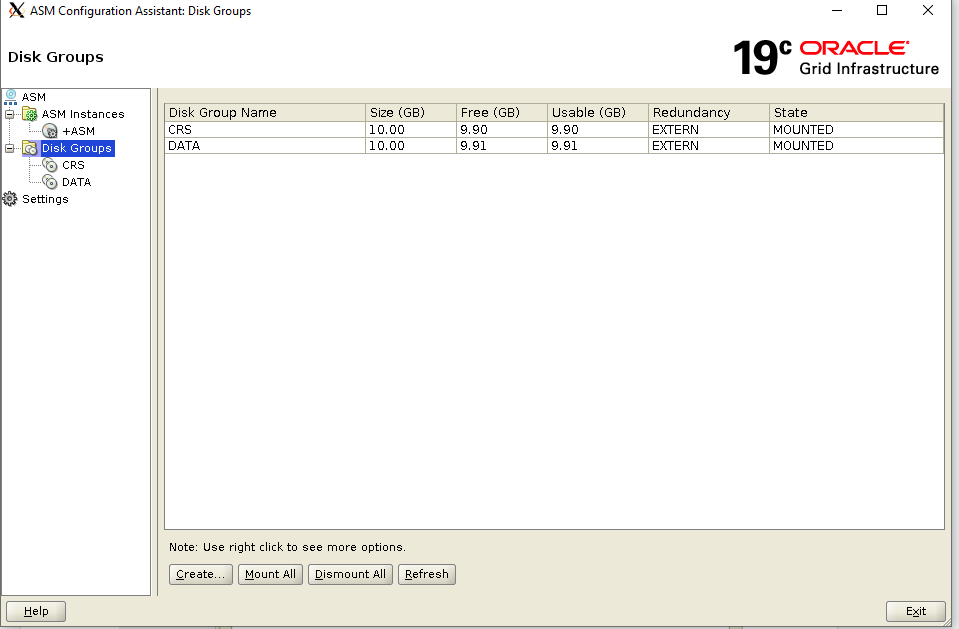
Give Disk Group Name as DATA
Select External(None)
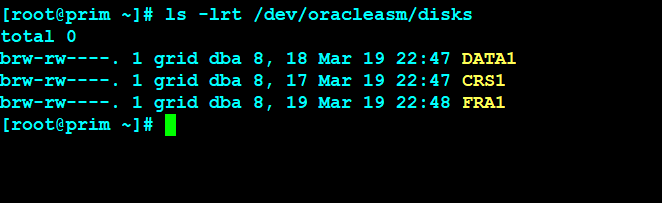
Select /dev/oracleasm/disks/DATA1
Click on OK
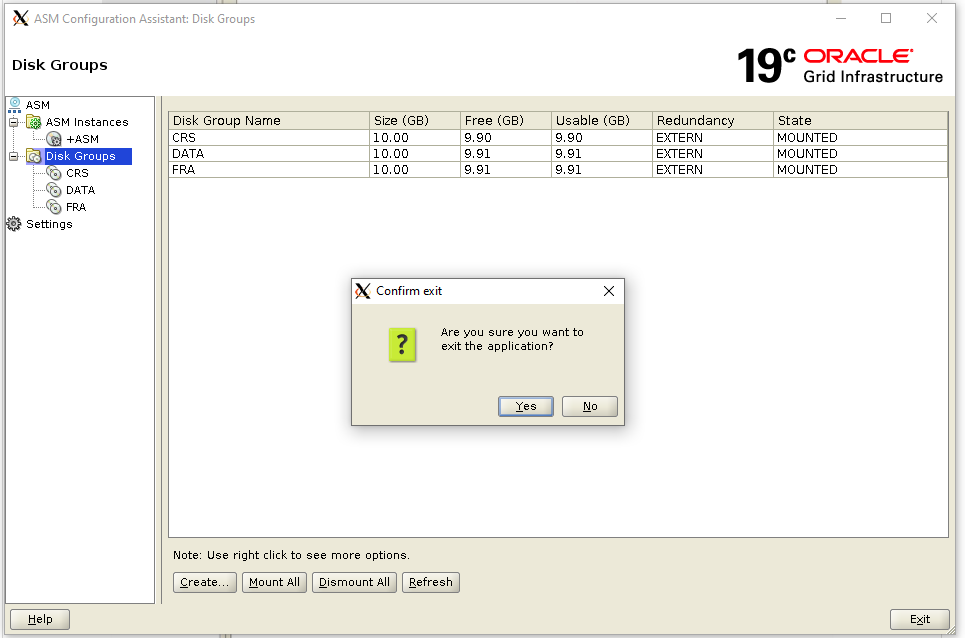
Click on Create
Give Disk Group Name as FRA
Select External(None)
Select /dev/oracleasm/disks/FRA1
Click on OK
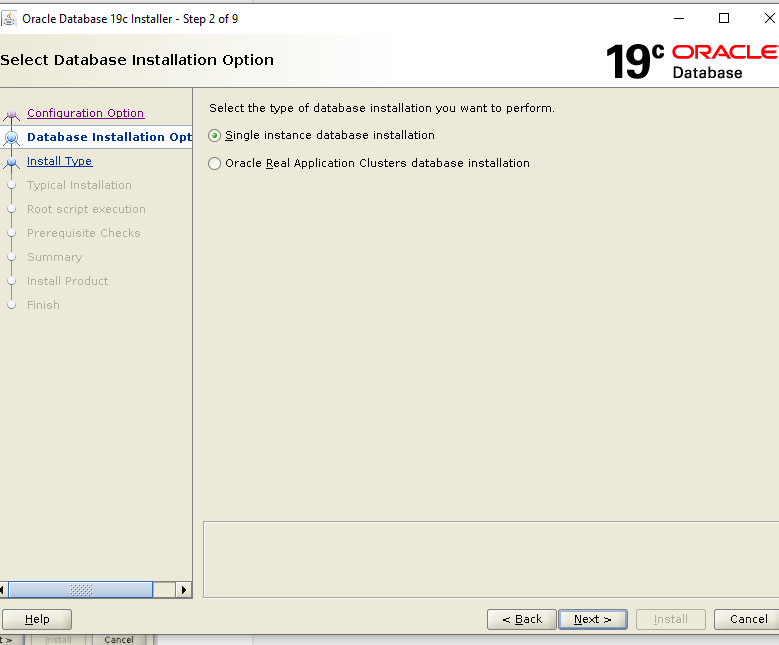
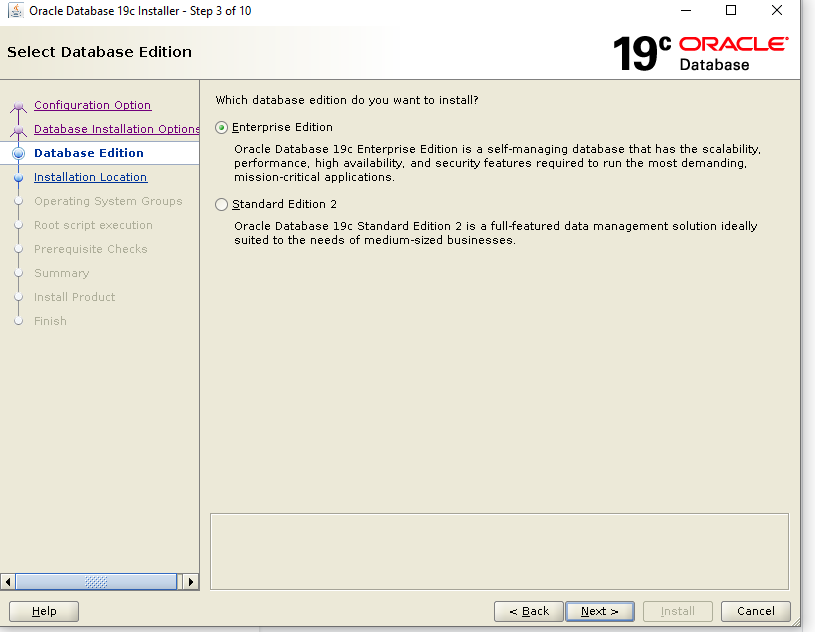
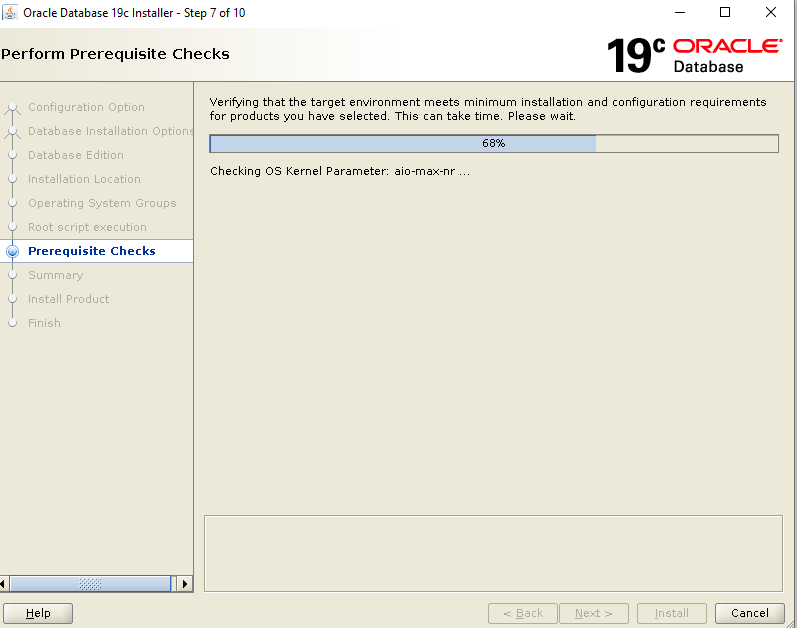
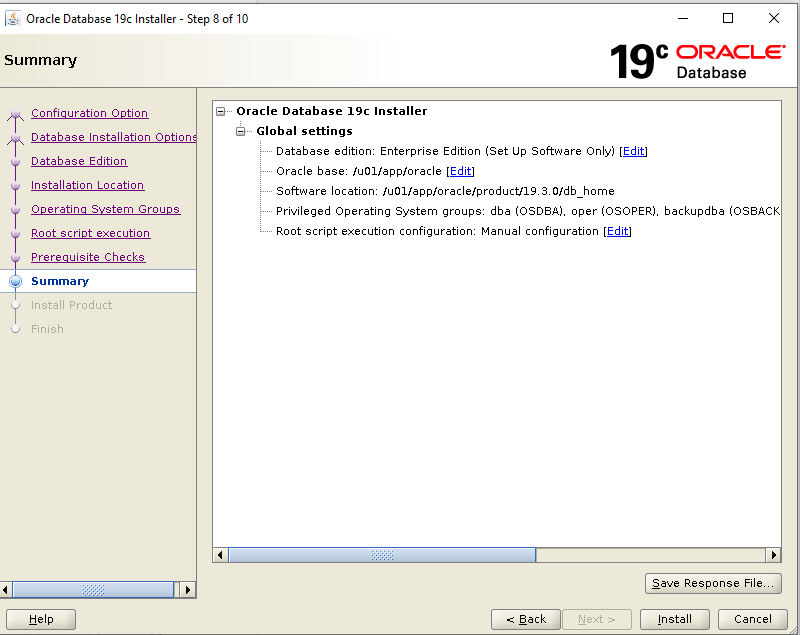
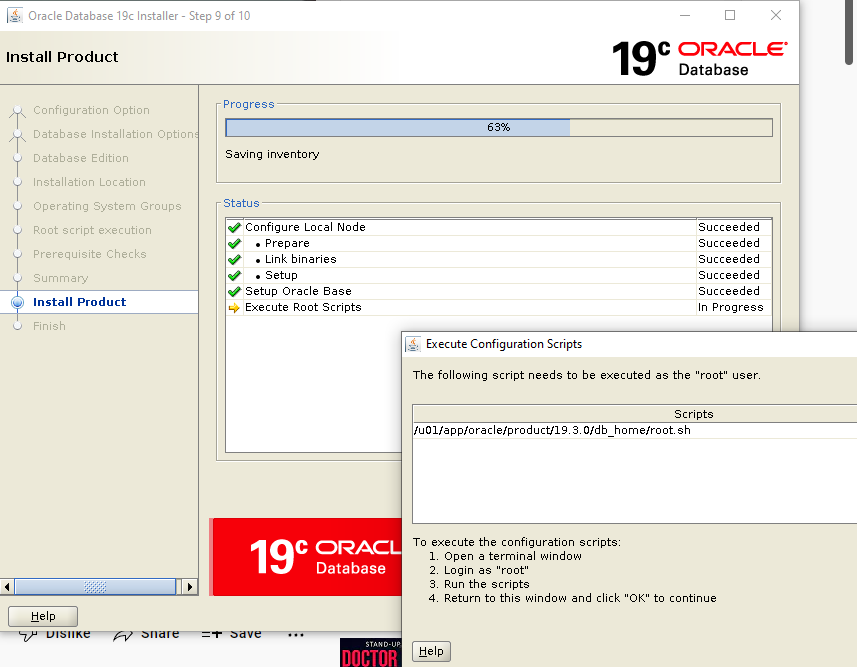
Install Oracle Software
Login as oracle
vi .bash_profile
Edit Oracle user bash profile and put below
vi .bash_profile

if [ -f ~/.bashrc ]; then
. ~/.bashrc
fi

# User specific environment and startup programs

# User specific environment and startup programs

export ORACLE_BASE=/u01/app/oracle
export ORACLE_HOME=/u01/app/oracle/product/19.3.0/db_home

export ORACLE_SID=prim

export LD_LIBRARY_PATH=\$ORACLE_HOME/lib:/lib:/usr/lib
export CLASSPATH=\$ORACLE_HOME/jlib:\$ORACLE_HOME/rdbms/jlib

PATH=$PATH:$HOME/.local/bin:$ORACLE_HOME/bin

export PATH